Creating an OpenID Connect Application in Microsoft Entra ID
The steps in this guide use Microsoft Entra ID as the example identity provider, as it is the most common in enterprise environments. If your organization uses a different OIDC-compliant provider (such as Google, Okta, or Ping Identity), the configuration steps in HP Insights are identical. You will still need a Client ID, Client Secret, and Well-Known Endpoint. Refer to your provider's documentation for how to register an application and retrieve these values.
Before you begin
-
You have a Microsoft Entra ID tenant.
-
You have an account with the required administrator role to create app registrations.
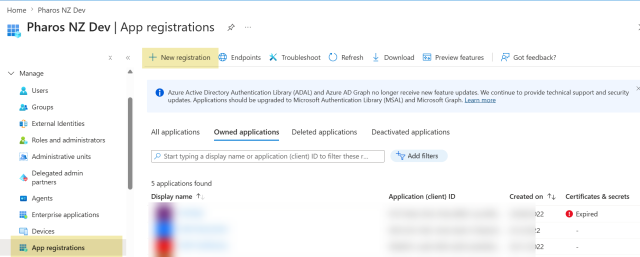
Step 1: Register a new application
Before configuring HP Insights, you must register it as an application in your Microsoft Entra ID tenant.
An application registration defines the application’s identity and security configuration in Microsoft Entra ID, enabling the platform to authenticate both the application and its users
-
Open your browser and go to https://entra.microsoft.com or https://portal.azure.com.
-
Sign in with an account that has the required administrator role.
-
On the Azure portal, under Manage, select App Registrations.
-
In the App Registrations pane, click the New Registration button.
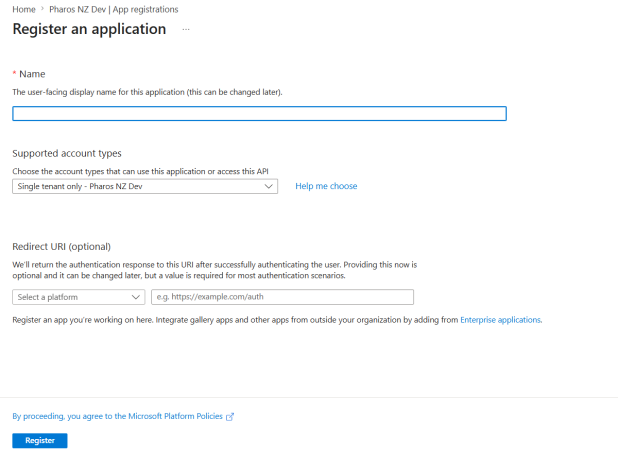
3. Fill in the Register an application page.
- Enter a Name that uniquely identifies the application. For example:HP Insights
- Select the option that best defines the users who will be allowed access. Typically, this will be the single directory tenant.
-
If your application requires authentication callbacks, set the redirect URI now. This can also be configured later.
- Click the Register button to complete registration. You will be redirected to the application’s Overview page.
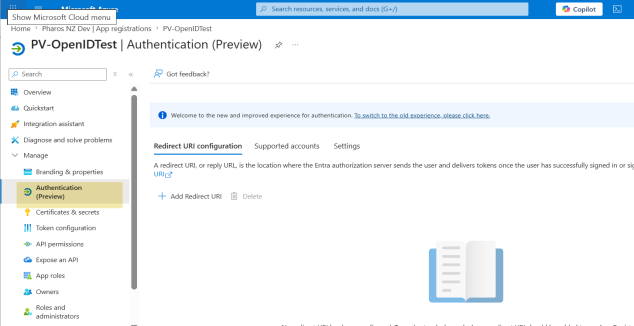
Step 2: Add a Redirect URI
Redirect URIs are the endpoints where Entra ID returns authentication responses (tokens) to your application.
-
Under Manage, select Authentication.
-
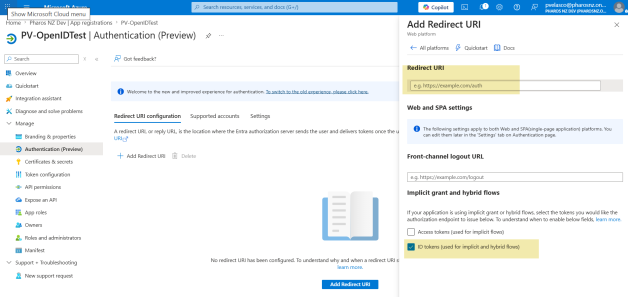
Select Add a Redirect URI.
-
In the Select a platform to add redirect URI, select Web.
-
Enter the redirect URI .
Redirect URI for HP Insights
HP EU: https://api-eu.insights.hpondemand.com/login/connect/external/signin-openidconnect
HP US: https://api.insights.hpondemand.com/login/connect/external/signin-openidconnect
-
Click Configure to Save.
Note: If you entered an incorrect Redirect URI and subsequently corrected it, the Secure Print app may not function properly. Exit the app from the system tray and reopen it to resolve this.
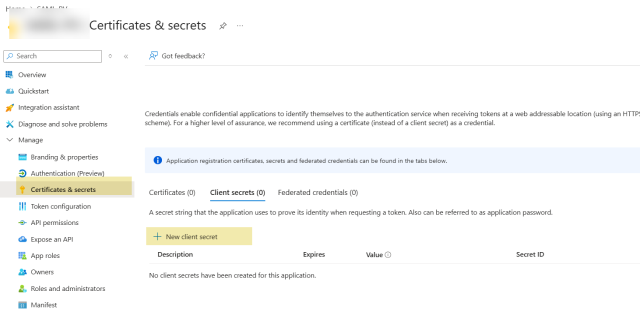
Step 3: Create a Client Secret
To authenticate as the application (not on behalf of a user), you need a credential either a client secret or a certificate. Navigate to Certificates & secrets in the left menu.
-
Under Manage, select Certificates & Secrets. Click the New client secret button.
-
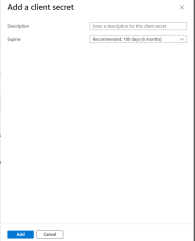
Fill in the Add a client secret page.
- Enter a Description that identifies the client secret. For example, Secure Print.
- Select an expiration.
- Click the Add button when completed.
-
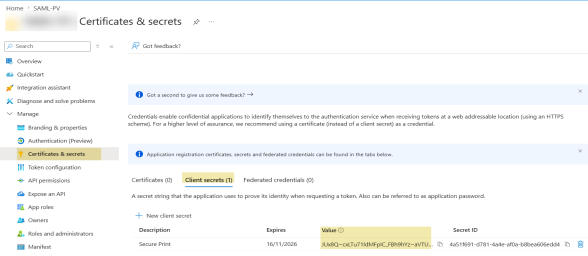
Copy the Value of the client secret. The value will be used later in this procedure.
-
 '
'
Step 4: Retrieve the Client ID and Well-Known Endpoint
-
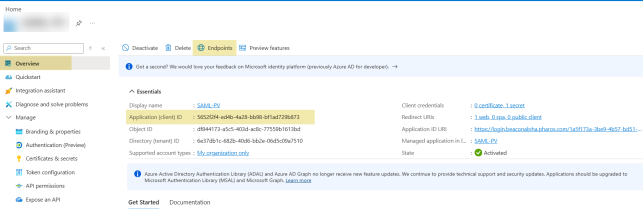
Select the Overview link from the left side menu and then copy the Application Client ID. This value will be used later in this procedure.
-
Click on the Endpoints button at the top of the Overview page.
-
Copy the value of the OpenID Connect metadata document URL. The value will be used later in this procedure.
Related Topics: