HP Insights Guest Print Overview
HP Insights Guest Print allows non-employees (visitors, contractors, etc.) to print documents without requiring user accounts in an organization’s directory system.
Guest Print is simple and straightforward. An employee (e.g., front desk staff) invites a guest user to print. The guest receives an email with a link to the Secure Print Guest portal. The guest prints by uploading documents using the Secure Print Guest portal and releasing those documents from a secure printer using the passcode provided.
Note: Guest Print requires OpenID authentication. Internal and Active Directory authentication options are not supported.
Note: It is recommended to use Guest Print exclusively for guests only. Employees of the organization will need to use traditional Secure Print clients for job submission and release.
Key Features
- Guests can print from any operating system. All a guests needs is a browser.
- Easy to set up. An employee only needs to enter the email address of a guest user in the web portal.
- Documents are secure. A document can only be released by the person who submitted it. Guests authenticate at a printer using a passcode. No documents are left on printer trays where anyone can access them.
Supported File Formats
- JPEG
- BMP
- PNG
- TXT
- Microsoft Office (doc, docx, xls, xlsx, ppt, pptx)
The maximum file size allowed for Guest Print is as follows:
- TXT: 10MB
- JPEG, BMP, PNG: 50MB
- MS Office Docs (.doc, .docx, .xls, .xlxs, .ppt, .pptx) : 60MB
- PDF: 250MB
Note: Uploading documents from a mobile device supports PDF and Microsoft doc file formats only. Images and text file formats are not supported.
Guest Print Workflow
An employee enables Guest Print
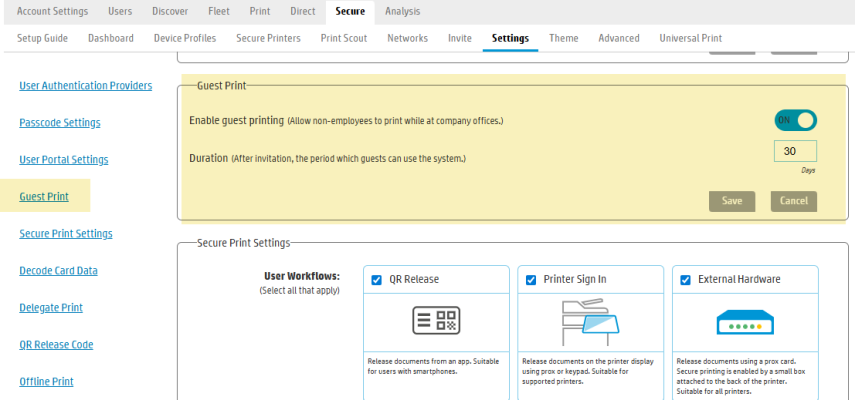
1. An employee (with suitable permission) enables Guest Print by toggling the Enable guest printing setting (in the Secure > Settings screen).
An employee invites a guest user
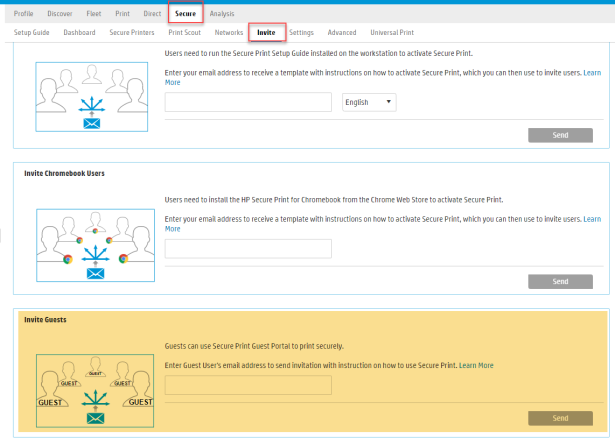
1. The employee navigates to the Secure > Invite tab of the web portal.
2. In the Invite Guests section, the employee enters the guest user's email address to send invitation with instructions on how to use Secure Print.
3. The employee clicks Send .
The guest user opens invitation email and uploads documents to print
1. The guest user receives a Guest Print invitation email. This invite includes a link to the Secure Print Guest portal. It also includes instructions on how to use the Guest Print system.
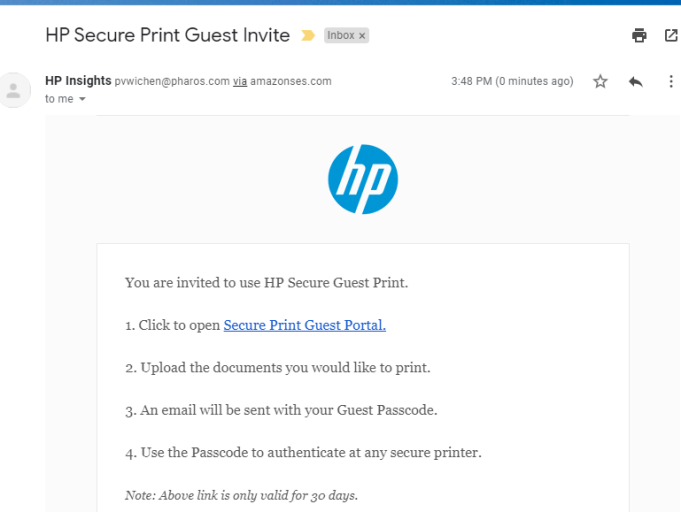
2. The guest opens the Secure Print Guest Portal by clicking the link in the email.
3. The guest uploads documents to print.
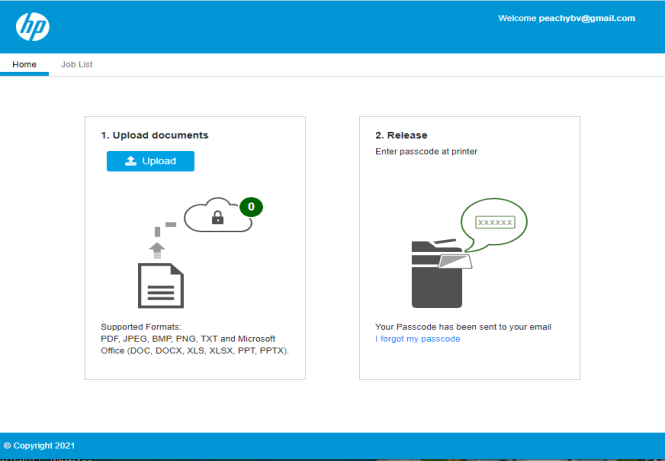
4. The guest user clicks Print. Documents are transferred and stored securely in the cloud.
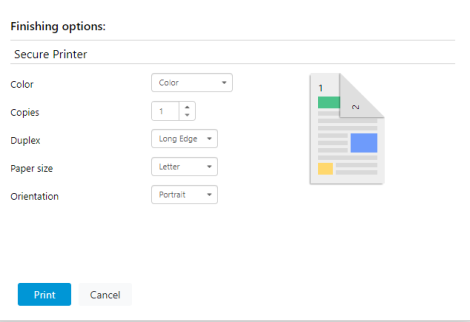
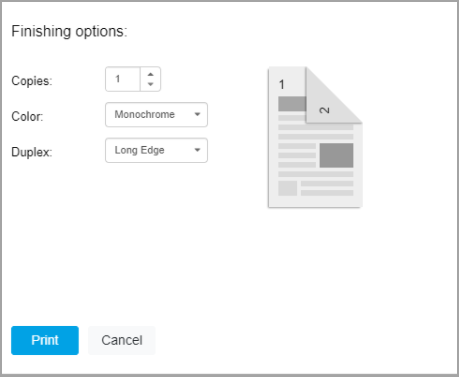
Note: Paper size and Orientation finishing options are not available for PDF and Microsoft Office documents.
5. Optional: The guest user clicks on the Job List tab to view a list of uploaded print jobs. Users can also delete jobs from this view.

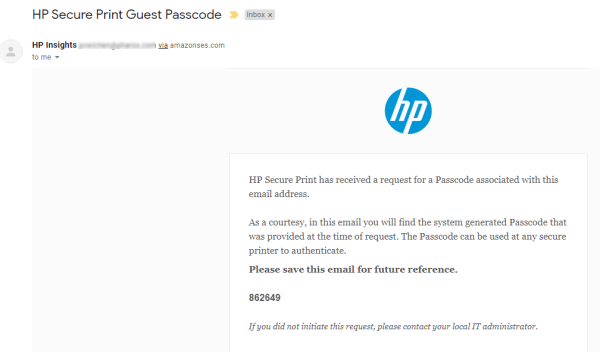
6. The guest receives another email containing the system generated passcode. This passcode will be used to authenticate at any secure printer to release documents.
The guest user releases documents
1. The guest walks up to a Secure Printer.
2. The guest authenticates at the printer using the passcode they received via email.
3. The guest releases the documents.
Note: The link to the Secure Print Guest Portal expires after 30 days by default. The Duration setting (the period in which guests can use the system after invitation) can be configured in the Secure > Settings screen of the Secure Print portal.
Note: Guest Print uses system generated passcode to identify users at a secure printer. Passcode authentication is currently available for HP, Konica Minolta (KM), Canon, and Lexmark printers only.
Guest Passcode
When a user accesses the Guest Portal, a unique guest passcode is automatically generated and sent to their registered email address. This passcode allows temporary access to the system or service. If the user forgets their passcode, they can simply click the "I forgot my passcode" link within the Guest Portal. A new passcode will then be generated and delivered to their email, ensuring continued access without compromising security.
Known Issues and Limitations:
The Guest Print feature has the following known issues and limitations:
- Changing Paper Size and Orientation are not available for uploaded PDF and MS Office documents.
- Uploading documents from a mobile device supports PDF and Microsoft Office file formats only. Images and text file formats are not supported.
Related Topics: